

A lot of tutorials out there are talking about how to make grass with 3ds max and V-Ray. Some are very poor and some are absolutely crazy good (see link) with everything in between. There are different techniques to create realistic grass including using displacement modifier / map, modeling and instancing, using V-Ray proxies, etc...
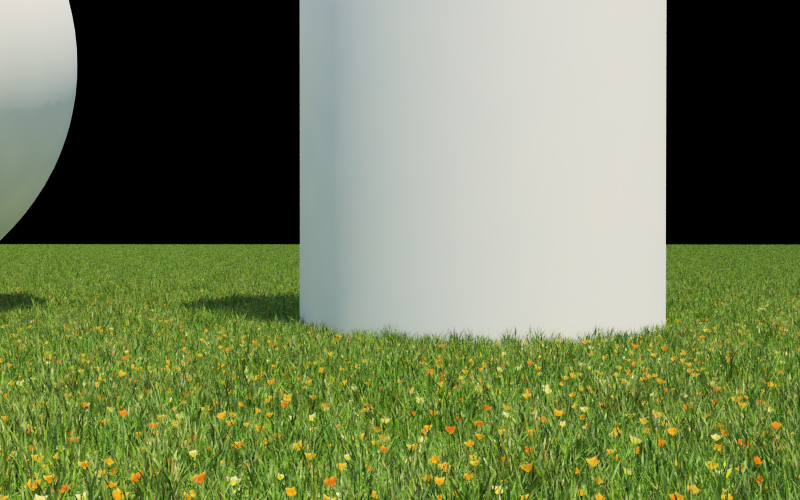
The deal here is to create grass on a flat ground, which is good looking (and visually not repetitive), and not too heavy in the viewport / renderer. All this with the minimum effort :)
I tried a few techniques and figured out that for me (so maybe for you) the most efficient way is using Vray proxies. It's a very powerful feature of V-Ray (Mental Ray have it too): it's very memory (RAM) efficient and render time (CPU) efficient, which are major advantages when creating CG grass. Plus it's light in the viewport.
So here is my simple and (in my sense) efficient work-flow:
1: Modeling:
First of all you have to model or buy a square of grass.
I have personally chosen 'Puzzle 12 AM63' from Evermotion (see puzzel 12 AM63) which for 15€ is a good time saver and delivers good results.
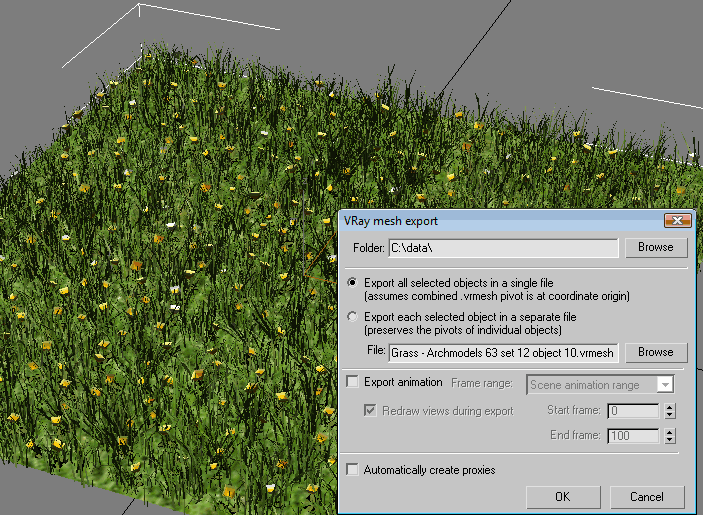
2: Export V-Ray proxy:
You have to prepare this square of grass into a V-Ray proxy.
Check the size, material, pivot point and whatever of your square of grass, because it will be the foundation of all the next steps.
I re-sized the square of grass for it to be 1 meter by 1 meter.
I centered the pivot point at the basis of the grass and then placed the grass in the middle of the scene (coordinates 0,0,0).
Now you can fine tune and test your grass material.
Then to create a V-Ray proxy (.vrmesh file) you select your object and right-click and then 'V-Ray mesh export'. No specific export option required here.
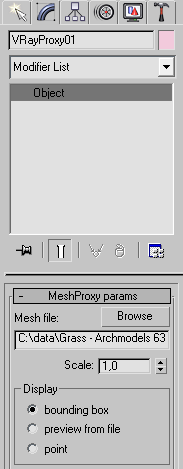
3: Import V-Ray proxy:
Reset 3ds max to have a fresh scene.
To import your V-Ray proxy (.vrmesh file) go to 'Create' then 'Geometry' then 'VRay' then 'VRayProxy' then 'Browse' then find your .vrmesh file.
Your grass model will be imported as a proxy into your scene. At this point you need to change the display option of your proxy into 'Bounding box' because it will be instanced hundred times and will kill your computer if you leave the default 'Preview from file' display option.
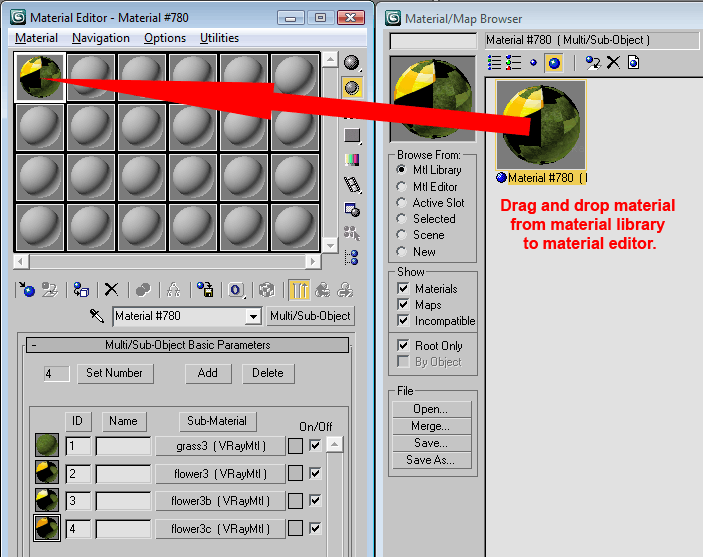
You have imported the mesh but not it's material so you have to import the material separately. To do so, go to the Material Editor and then 'Get material' and then 'Mtl library' and then 'Open' and then choose 'File type = .max' and then find your .max file (the one with the grass model and it's material ; the one of the step 2). Drag and drop the material from the Material/Map Browser into an available spot in the Material Editor. Then apply this material to the V-Ray proxy in the scene.
Now you have your grass proxy with it's material assigned, ready to be instanced in order to create a field of grass.
4: Array:
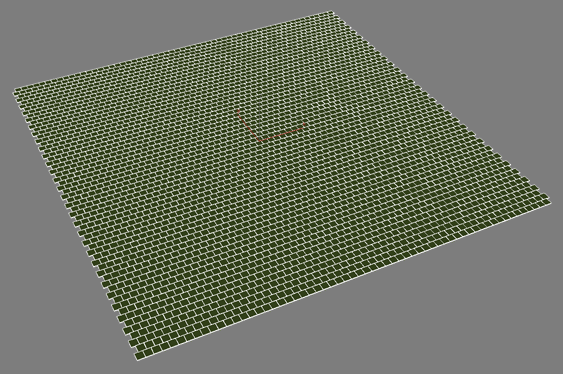
Now you just need to use the Array tool of 3ds max to multiply your square of grass to create a field of grass.
Using the 'Top' view is recommended for this step.
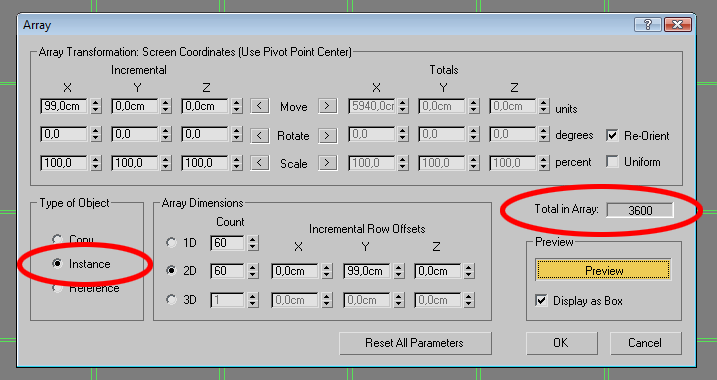
Here are my settings for the Array tool :
X = 99cm.
Type = Instance (very important!).
Count 1D = 60.
Dimensions = check '2D'.
Count 2D = 60.
Incremental row offset : Y = 99cm.
You can preview your array ; you can also undo and retry if needed.
Basically the aim here is to obtain a 60x60 repetition of your original square of grass.
I used a distance of 99cm instead of 100cm so that the squares slightly overlap on their edges to have a better continuity between them.
Original post
No comments:
Post a Comment